

NEW
WOODWORK BEADING AND CAPPING IN SCM HURLEY 22 1115 VIXEN
BY
KEVIN MITCHELL BOAT OWNER AND PROPRIETOR OF
JOINERY BUSINESS
KNOWN AS WOODWORX
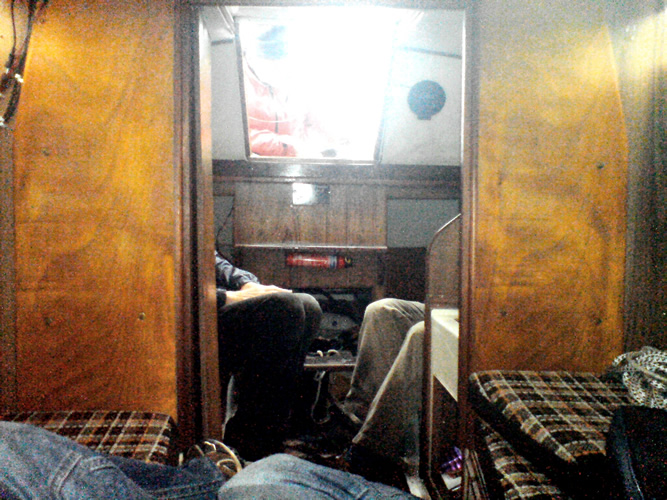
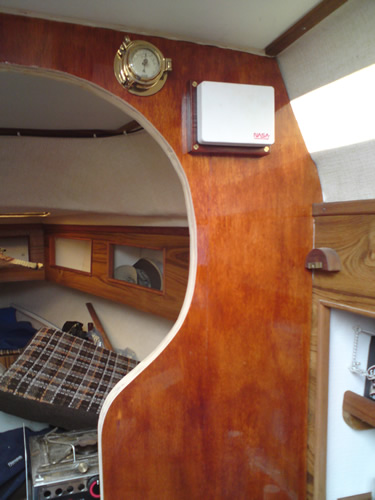
Kevin's boat Vixen is currently kept in Torquay she was formerly known as Sundowner when previously owned and used as a sailing school boat at Rock in Cornwall. To provide a measure of privacy at that time a small bi fold door had been fitted to an altered main bulkhead. When I bought the boat I felt there was no longer a need for this and it also made the interior look rather cramped and so proposed to return the opening to the original graceful broad keyhole shape. In my mind I also planned to fit a roller blind in place of the door.
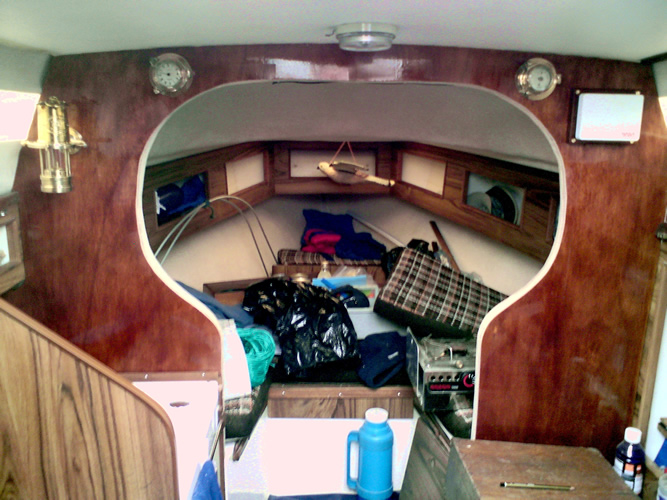
Once the boat was in my posession I spent some time making a list of work to do inside and started by removing everything unwanted and preparing the bulkhead to receive a surface covering of thin 5mm Meranti veneered marine ply from Robbins of Bristol. I made patterns from cardboard to ensure a good fit, port and starboard and also on the small divide between the galley and the port hand quarter berth. Both these original laminated surfaces had been damaged over time with scratches and old screw holes. Once I had cut the plywood on my small band saw at home I offered them up in place to make fine adjustments for a perfect fit then returned home to begin the process of staining and varnishing. I used two coats of Mid Oak stain varnish followed by five coats of clear gloss.
Having worked as a shopfitter in the past I am well aware of various types of glue especially when fixing plywood to a laminate. For this it is a good idea to score the laminate with a series of diagonal lines one way then repeat the process in the opposite direction, I used one corner of the blade of a sharp chisel. The scored laminate then provides a good key for the glue. I chose a relatively cheap modern impact type which boasted being suitable for marine environments and had around ten minutes to be sure my wood was properly in place. However, full strength would not be achieved for twenty four hours so I therefore made use of a number of different types of cramps and long bars of wood with soft pads on placed between the ply and suitable jutting out other parts of the boat.
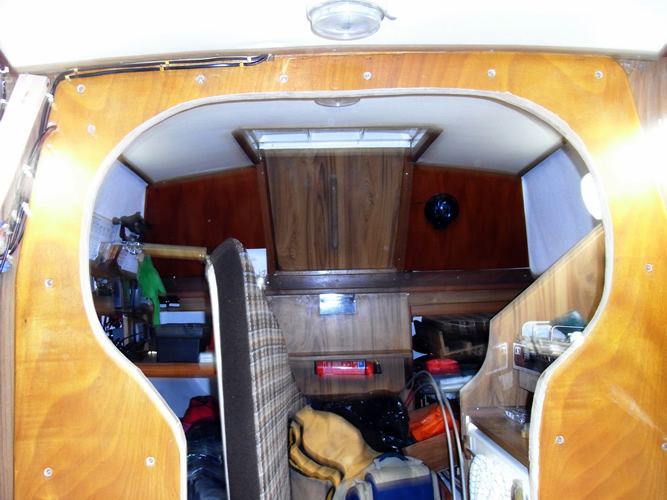
Once the glue had set and all the cramps removed I prepared the surface of the cut out keyhole shape to accept a solid wood surround, which I was going to bend myself to fit. Now the traditional method of bending wood is to steam it but I had researched alternative methods and found an Italian company who had skilfully worked out that if the cellular structure of certain timbers is suitable a baulk of timber can be compressed both over it's length and breadth under great mechanical pressure and may be stored indefinitely in dry conditions until required. The British agents for this treated timber known as Bendywood are called The Angle Ring Company and are based at Tipton, in the West Midlands. When someone wants to use it, the timber can be sawn, planed and spindle moulded dry then it is placed on blocks of wood on sheets of wet cardboard within a wrapping of polythene. The whole parcel is folded neatly and tied securely and left for a week for the timber to absorb the moisture, thereby expanding the cellular structure again.
Whilst this was happening for me I used my original cardboard former inner radii and measured the distance they would be apart to provide the full bulkhead shape. I drew this onto a half sheet of ¾ inch chipboard (half being across not down it's length) and then proceeded to screw blocks of wood to the outside of my line allowing for the thickness of my new beading which I had had rebated out so as to go over the edge of the bulkhead cut out. An additional piece of 18mm plywood had originally been fitted by the previous owner to the forward facing side of the bulkhead which I had left to add general strength so my rebated bead was done to a width of 36 mm plus 5mm new ply plus 1 ½ mm extra so it would not to be too tight. The width of my bead allows it to project beyond both wood surfaces by around 15mm on each side which provides a grip edge but means that the overall width is 72 1/2mm which is a formidable width to bend for anyone by any method.
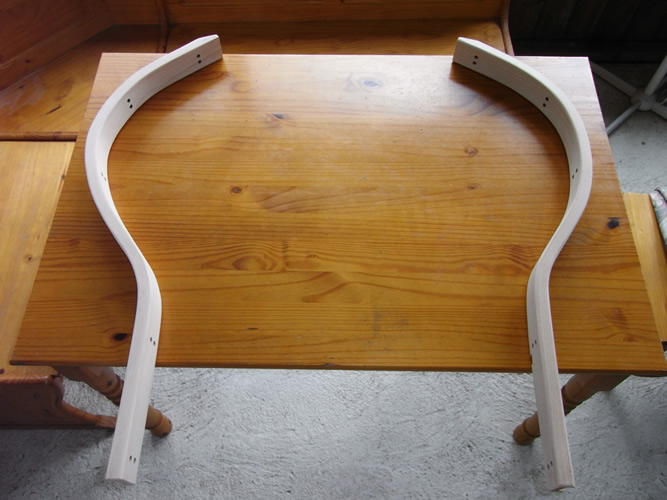
Once all the blocks were in place I cut additional ones which would be placed inside the beading as it was being bent around the radius under pressure from various types of cramps but mostly sash type. The day came to do the bending and the process has to be achieved fairly quickly and preferably in dampish or at least humid conditions. There are no photographs of this as I needed both hands to do the job! Once the timber was in place and well cramped down it was left for a further week before removal and the results are as you see them, two handed pieces.
The capping for what I shall refer to as the 'galley divide' was nothing like the main bulkhead in dimension or rebate but this again was done using a former in a similar way. I also cut back the original divide on the outer radius to form the inverted part of a handle and when the bead was in place it provides a very useful hand hold.
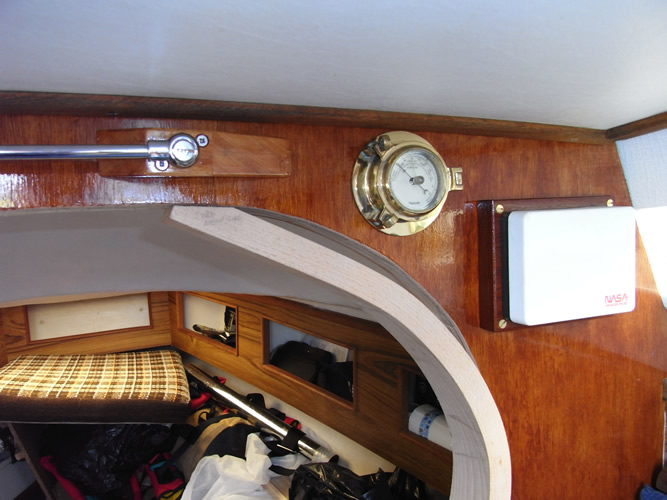
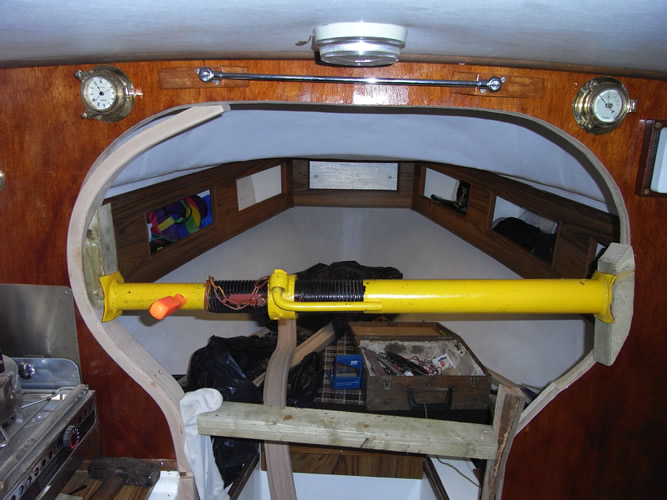
On my first visit to Vixen with the bent timber I realised they did not fit completely to the bulkhead shape but I knew all was not lost and had planned for this by hiring a brand new 'trench prop' like an acro which builders use for holding a lintel in place whilst knocking down a supporting wall, my prop was shorter and new because builders generally get this type of equipment pretty dirty. In my photo you will see this as a bright yellow tubular bar one end of which cranks in and out on a thread and it enabled me to work gradually up and around my bead putting in a pair of 2 inch x 10 screws side by side every 200mm. All went well and no glue has been used at all. Before the screws were put in I pre drilled each hole with a special bit to provide a recessed short hole at the outer end where I knocked in wooden plugs I had cut earlier (these are glued in). I also had to scarph in a header piece of timber which incidentally is Beech to match the Bendywood, a timber not ordinarily associated with boats but whose cellular structure is one of the better types for this process and since it is varnished and not exposed to the weather there should be no future problems.
My next photos show the raw unfinished beading with tiny plug ends above the surface. I then left that particular job for another week to allow things to dry and to settle.
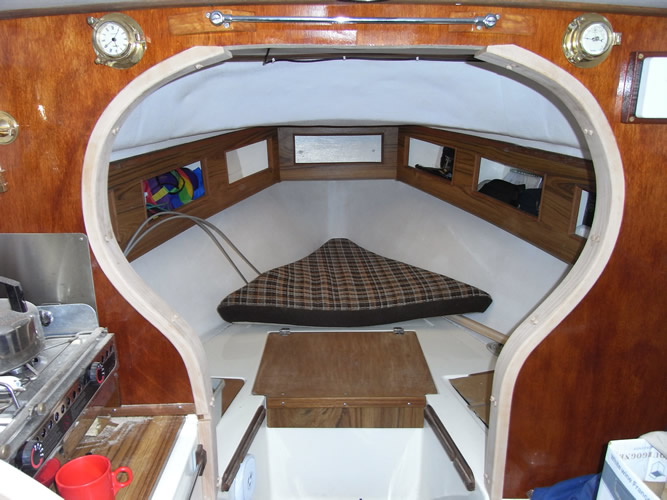
With a sharp chisel I pared off each wooden plug and sanded the whole surface prior to a long process of stain and varnish with many coats and the result is as you see it, quite an achievement but I set out to do this and it certainly was a challenge for my woodworking skills. From the arrival of a rather banana shaped piece of timber just over two metres long x 100mm x 50mm I had marked out and cut the timber myself then had Bovey Joiners machine each piece with the spindle moulder to my specifications, bought the additional header piece from them as untreated because that piece would not require bending and completed the whole subsequent processes it had taken three months of care, precision and dedication.
Just to finish this technical piece of work I have a couple of photos which show the newly covered forward facing side of the main bulkhead complete with the blind.
Kevin Mitchell SCM H22 No 1115 Vixen, Torquay
PICTURES OF THE PROJECT
Click on an image to enlarge
 |
 |
 |
|
1. Original layout looking aft |
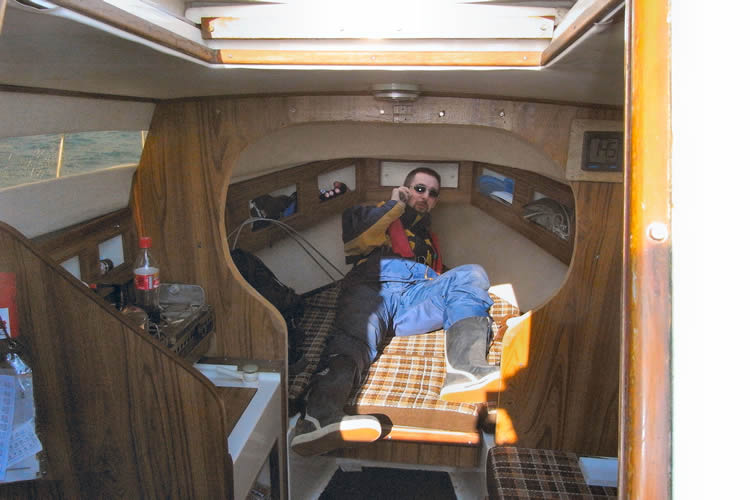
2. Old bulkhead and my son Chris |
3. Original shape recut |
 |
 |
 |
|
4. New plywood face |
5. Starboard |
6. Port |
 |
 |
 |
|
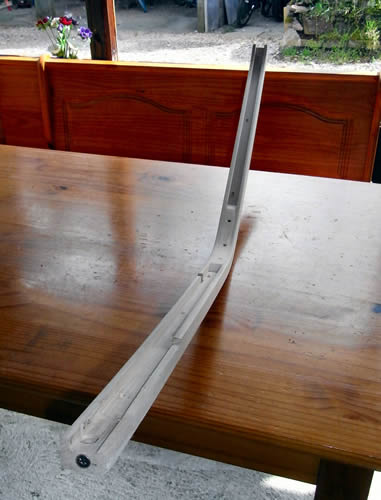
7. Capping prior to bending |
8. Capping for galley divider |
9. Capping bent |
 |
 |
 |
|
10. Handed cappings |
11. Starboard gap |
12. Added pressure plus screws |
 |
 |
 |
|
13. Both sides in |
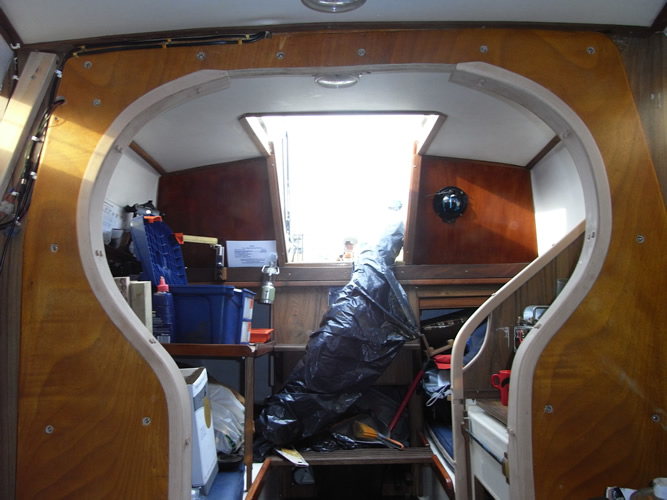
14. Looking aft - also new ply by hatch |
15. Nearly done plus galley divide |
 |
 |
 |
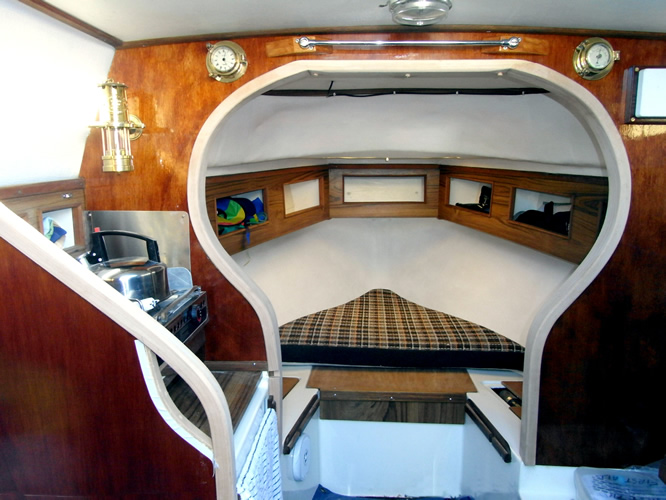
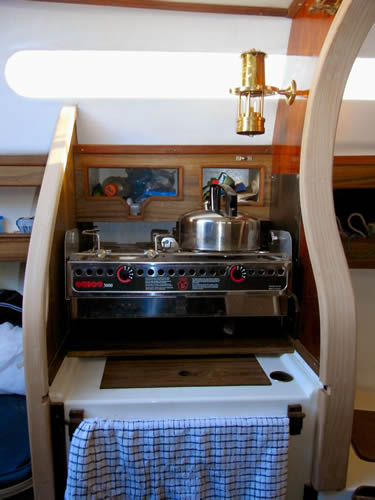
16. View into the galley with the main bulkhead capping to the right |
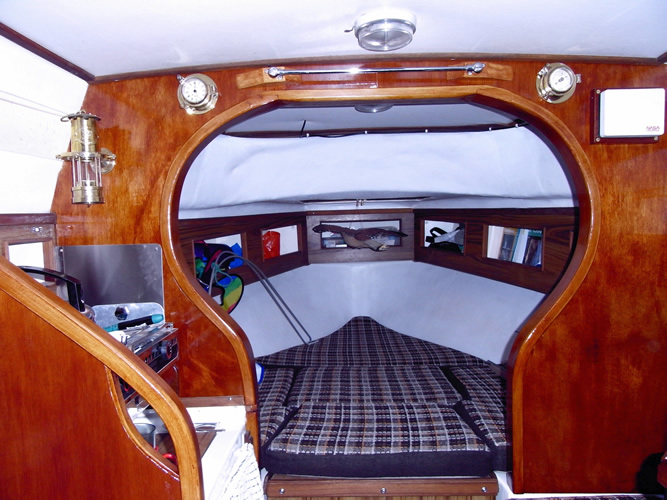
17. All stained and varnished - the bulkhead from aft looking forward |
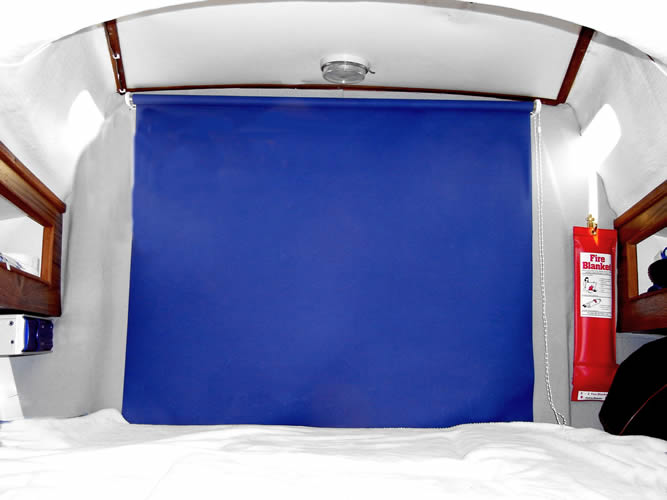
18. From the stern looking forward with the blue blind fully extended down |
 |
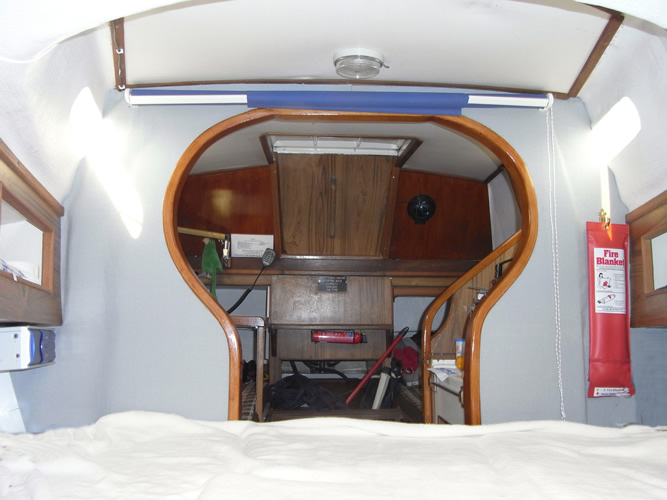 |
19. Forrard cabin with blind down looking aft. |
20. The carpeted bulkhead |